

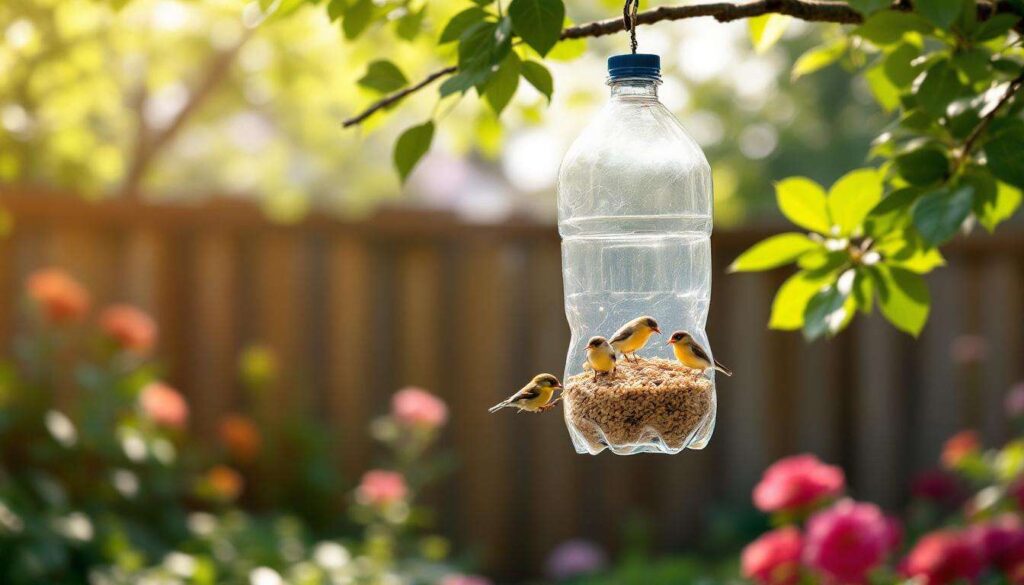
Transforming an ordinary plastic bottle into a functional bird feeder offers an eco-friendly solution to attract feathered visitors while reducing waste. This simple DIY project requires minimal materials and basic tools, making it accessible to anyone interested in supporting local bird populations. The process involves strategic cutting, proper positioning of feeding openings, and thoughtful placement to create a reliable food source that birds will return to repeatedly.
Materials needed to make a plastic bottle bird feeder
Gathering the right supplies ensures a smooth construction process and a durable final product. Most items are readily available around the house or can be purchased inexpensively at local stores.
Essential components for your feeder
The foundation of this project starts with selecting an appropriate plastic bottle. A two-liter soda bottle works exceptionally well due to its size and durability, though smaller bottles can accommodate fewer birds. The plastic should be clean, dry, and free from cracks or damage that might compromise structural integrity.
- One clean plastic bottle with cap
- Two wooden spoons or dowels for perches
- Strong twine or wire for hanging
- Scissors or craft knife
- Birdseed appropriate for local species
- Optional: waterproof markers for decoration
Safety equipment and preparation tools
Working with cutting tools requires proper safety precautions to prevent injuries. Protective gloves shield hands from sharp edges created during the cutting process, while a stable work surface ensures accurate cuts and prevents accidents.
Understanding what materials you need naturally leads to preparing the bottle itself for transformation into a functional feeder.
Preparation and cutting of the plastic bottle
Proper preparation determines the longevity and effectiveness of your bird feeder. Taking time to clean and mark the bottle correctly prevents mistakes and ensures birds can access food easily.
Cleaning and drying the bottle thoroughly
Remove all labels and adhesive residue from the plastic surface using warm soapy water. Residual sugars or chemicals from the bottle’s previous contents can harm birds or spoil the seed. Rinse multiple times with clean water and allow the bottle to air dry completely, as moisture inside will cause seed to clump and mold.
Marking cutting lines for precision
Use a permanent marker to indicate where cuts will be made. For a standard two-liter bottle, mark two circular openings approximately two inches in diameter on opposite sides of the bottle, positioned about four inches from the bottom. These measurements provide adequate access while maintaining structural support.
| Bottle size | Opening diameter | Distance from bottom |
|---|---|---|
| 1 liter | 1.5 inches | 3 inches |
| 2 liters | 2 inches | 4 inches |
| 3 liters | 2.5 inches | 5 inches |
With the bottle properly prepared and marked, the next step involves creating openings that allow birds comfortable access to the seed inside.
Creating the bird feeding opening
The feeding opening serves as the primary access point for birds and must balance accessibility with weather protection. Careful execution prevents sharp edges that could injure visiting birds.
Cutting techniques for smooth edges
Pierce the plastic at the center of your marked circle using the tip of sharp scissors or a craft knife. Cut slowly along the marked line, applying steady, even pressure to create a clean edge. Avoid sawing motions that create jagged plastic fragments.
Smoothing and protecting the opening edges
Sharp plastic edges pose a serious threat to delicate bird feet and feathers. Several methods effectively smooth these edges:
- Carefully melt edges using a lighter held at a safe distance
- Sand rough spots with fine-grit sandpaper
- Apply waterproof tape around the perimeter
- Use a heated metal spoon to gently round sharp corners
Test the smoothness by running your finger around the opening. Any catches or rough spots require additional attention before proceeding.
Positioning openings for optimal drainage
Place openings slightly higher than the bottle’s base to prevent seed from spilling during windy conditions. This positioning also allows rainwater to drain from the bottom, keeping stored seed dry and preventing mold growth that could sicken birds.
Once feeding openings are complete and safe, adding perches gives birds a comfortable place to land and eat.
Adding perches for easy bird access
Perches provide stability for birds while feeding and significantly increase the feeder’s usability across different species. Proper installation ensures perches remain secure through various weather conditions.
Selecting appropriate perch materials
Wooden spoons offer an ideal perch solution due to their natural texture and comfortable grip for bird feet. The handle serves as the perch while the spoon portion catches fallen seeds. Alternatively, wooden dowels cut to six-inch lengths provide simple, effective perching surfaces.
Installing perches securely
Create small holes directly below each feeding opening using a heated nail or drill bit slightly smaller than your perch diameter. Push the perch through the bottle, ensuring it extends through both sides for maximum stability. The tight fit prevents rotation and keeps perches firmly in place.
For wooden spoon perches, insert the handle through one feeding opening and pierce through the opposite side of the bottle. The spoon bowl should rest just below the opening, creating a natural landing platform and seed catcher.
Testing perch stability before use
Apply downward pressure to each perch, simulating the weight of multiple birds. Perches should not wobble, rotate, or pull free from the bottle. Unstable perches discourage birds from using the feeder and may cause injuries if they give way unexpectedly.
With a fully constructed feeder featuring safe openings and sturdy perches, proper installation location becomes the next critical consideration.
Installing the feeder in your garden
Strategic placement maximizes bird visits while protecting them from predators and harsh weather. Location selection directly impacts both bird safety and your viewing enjoyment.
Creating a secure hanging system
Drill two small holes through the bottle cap and thread strong twine or wire through them, creating a loop for hanging. Alternatively, wrap wire around the bottle neck several times, twisting it securely to form a hanging loop. The attachment point must support the combined weight of the bottle, seed, and multiple birds without breaking.
Choosing the optimal location
Select a spot that balances visibility for bird watching with safety considerations. The ideal location includes:
- Distance of at least ten feet from dense bushes where predators hide
- Partial shade to prevent seed spoilage from direct sunlight
- Protection from strong winds that could swing the feeder excessively
- Clear flight paths for birds to approach and depart safely
- Visibility from windows for observation without disturbing visitors
Height considerations for different bird species
Hang the feeder between five and six feet from the ground to accommodate most common backyard bird species while remaining out of reach for ground predators. Lower heights attract ground-feeding species but increase vulnerability to cats and other threats.
After installation, establishing a maintenance routine ensures the feeder remains safe and attractive to birds throughout its use.
Regular maintenance and cleaning of the bird feeder
Consistent upkeep prevents disease transmission between birds and extends the feeder’s functional lifespan. Neglected feeders become breeding grounds for harmful bacteria and mold.
Establishing a cleaning schedule
Remove the feeder every two weeks for thorough cleaning, or more frequently during wet weather when mold develops rapidly. Disassemble removable components and discard any remaining seed, as old seed loses nutritional value and may harbor pathogens.
Proper cleaning methods
Wash all feeder components using hot water mixed with mild dish soap or a solution of one part bleach to nine parts water. Scrub interior surfaces with a bottle brush to remove stuck seed and debris. Rinse thoroughly multiple times to eliminate all cleaning solution residue, which could harm birds.
| Cleaning frequency | Weather condition | Reason |
|---|---|---|
| Every 2 weeks | Dry weather | Standard maintenance |
| Weekly | Wet or humid | Prevent mold growth |
| Every 3-4 days | After rain | Remove moisture |
Inspecting for damage and wear
Check the bottle for cracks, holes, or deterioration from sun exposure during each cleaning. Examine perches for looseness and ensure feeding openings remain smooth. Replace the entire feeder when structural integrity becomes compromised, as damaged feeders pose safety risks to visiting birds.
Refilling with fresh seed
Only refill the feeder with fresh, dry seed after it has completely dried from cleaning. Fill to approximately three-quarters capacity to allow seed to flow freely to the openings while preventing waste from overfilling.
Creating a plastic bottle bird feeder combines environmental responsibility with wildlife support, transforming waste into a valuable resource. This straightforward project requires minimal investment while providing significant benefits to local bird populations. The feeder’s simple design allows for easy customization and replacement, ensuring continuous support for feathered visitors throughout seasons. Regular maintenance protects bird health while maximizing the feeder’s effectiveness, creating a sustainable feeding station that enriches both your garden and the broader ecosystem. By following these steps carefully, anyone can contribute to wildlife conservation while enjoying the beauty and activity birds bring to outdoor spaces.