

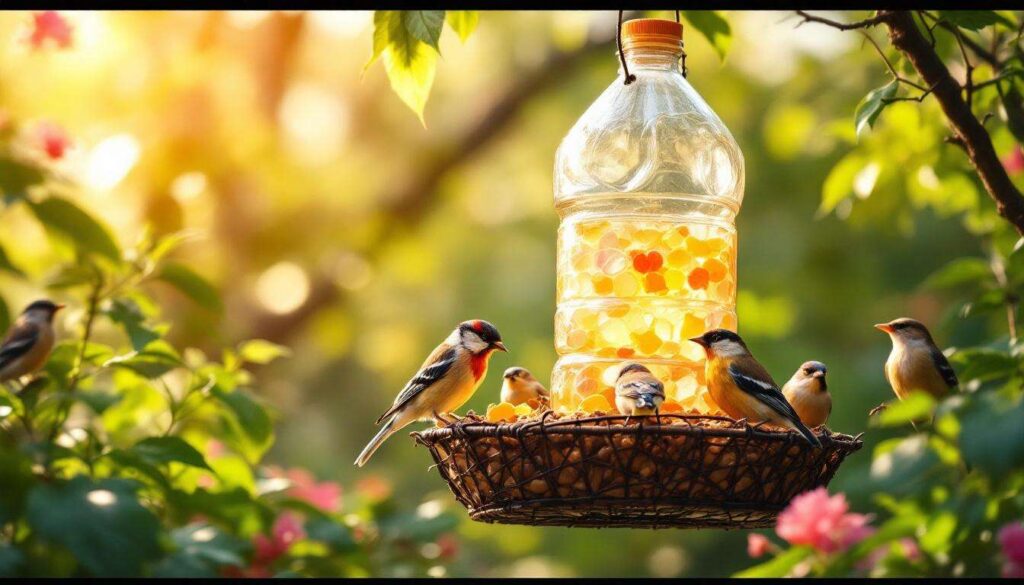
Transforming everyday household items into functional outdoor accessories represents both environmental consciousness and practical creativity. A simple plastic bottle, destined for the recycling bin, can become a welcoming feeding station for backyard birds in less time than it takes to brew a pot of coffee. This straightforward project requires minimal tools, costs virtually nothing, and provides immediate benefits to local bird populations while offering endless opportunities for observation and enjoyment.
Necessary materials
Essential items for construction
The foundation of this project begins with selecting the right plastic bottle. A two-liter soda bottle works exceptionally well due to its size and durability, though smaller one-liter bottles can accommodate finches and other petite species. The bottle should be clean, dry, and free from labels for optimal results.
Beyond the bottle itself, assembling the following materials ensures smooth construction:
- Two wooden spoons or dowels for perches
- Sharp scissors or a utility knife
- Twine, wire, or sturdy string for hanging
- Birdseed appropriate for local species
- Optional: acrylic paint or outdoor markers for decoration
Tool selection considerations
The cutting implement deserves particular attention. A sharp utility knife provides greater control when creating precise openings, while heavy-duty scissors work adequately for those less comfortable with blade tools. Safety should remain paramount throughout the construction process, regardless of tool choice.
| Tool | Best For | Safety Level |
|---|---|---|
| Utility knife | Precision cuts | Requires caution |
| Heavy scissors | Larger openings | Moderate risk |
| Heated nail | Small holes | Burn hazard |
Once materials are gathered and organized, the actual construction phase can begin with proper bottle preparation.
Preparing the bottle
Cleaning and label removal
Thorough cleaning prevents contamination of birdseed and ensures the feeder remains hygienic for visiting birds. Remove all labels by soaking the bottle in warm soapy water for fifteen minutes, then scrubbing away adhesive residue with a sponge. Rinse completely and allow the bottle to air dry before proceeding.
Marking hole locations
Strategic placement of feeding holes maximizes functionality while maintaining structural integrity. Using a permanent marker, indicate where openings will be cut. For a two-liter bottle, position two sets of holes on opposite sides, approximately four inches from the bottom. This arrangement allows multiple birds to feed simultaneously without competition.
Consider these placement guidelines:
- Maintain at least three inches between hole sets
- Keep openings two inches in diameter for accessibility
- Ensure holes align with planned perch positions
- Leave the top quarter of the bottle intact for seed storage
With markings complete and the bottle properly prepared, attention turns to creating the access points that will allow birds to reach their food.
Drilling the feeding holes
Creating the main openings
The feeding holes serve as the primary access points for birds. Using scissors or a utility knife, carefully cut circular or oval openings at the marked locations. Start with a small pilot hole and gradually enlarge it to the desired size, which prevents cracking and maintains control throughout the cutting process.
Each opening should measure approximately two inches in diameter, sufficient for common backyard birds such as chickadees, finches, and sparrows. Larger species like cardinals benefit from slightly bigger openings, while smaller holes deter squirrels and larger aggressive birds.
Drainage and ventilation considerations
Moisture accumulation can spoil birdseed and create unhealthy conditions. Address this concern by puncturing several small drainage holes in the bottle’s base using a heated nail or small drill bit. These quarter-inch openings allow water to escape without permitting seed loss.
| Hole Type | Size | Purpose |
|---|---|---|
| Feeding openings | 2 inches | Bird access |
| Drainage holes | 0.25 inches | Water removal |
| Perch holes | 0.5 inches | Spoon insertion |
The completed openings now require accompanying perches to provide comfortable feeding platforms for visiting birds.
Adding perches for birds
Installing wooden spoon perches
Wooden spoons offer an ingenious dual-purpose solution, functioning simultaneously as perches and seed dispensers. Position a spoon so its handle extends through the bottle, with the bowl protruding outside beneath a feeding hole. The bowl catches seed that flows from the opening above, while the handle inside the bottle creates a landing spot on the opposite side.
Creating perch holes requires precision. Directly below each feeding opening, pierce a hole slightly smaller than the spoon handle’s diameter. Insert the handle from outside, pushing it through the bottle until the bowl rests beneath the feeding hole. The snug fit holds the spoon securely without additional fasteners.
Alternative perch options
When wooden spoons are unavailable, several alternatives provide adequate perching surfaces:
- Wooden dowels or chopsticks inserted through aligned holes
- Small branches secured with waterproof adhesive
- Plastic straws reinforced with wire for lightweight species
- Bent wire coat hangers shaped into landing platforms
Regardless of material choice, perches should extend at least two inches from the bottle’s surface to accommodate various bird sizes comfortably. With functional perches installed, the feeder gains both practicality and visual appeal through thoughtful customization.
Customizing the feeder
Decorative painting techniques
While functionality remains paramount, aesthetic enhancement increases enjoyment and can help the feeder blend with or complement garden surroundings. Acrylic paints designed for outdoor use adhere well to plastic surfaces and withstand weather exposure. Apply bright colors to attract attention or earth tones for natural integration.
Painting considerations include:
- Avoid painting near feeding holes to prevent chip ingestion
- Use non-toxic, bird-safe paints exclusively
- Apply multiple thin coats rather than single thick layers
- Allow forty-eight hours for complete curing before filling
Weather protection enhancements
Extending the feeder’s lifespan requires protecting it from environmental elements. A clear acrylic sealant sprayed over painted surfaces prevents fading and moisture damage. Additionally, creating a simple roof from a plastic plate or second bottle bottom shields seed from rain while maintaining accessibility.
| Enhancement | Benefit | Implementation Time |
|---|---|---|
| Acrylic sealant | Weather resistance | 5 minutes |
| Bottle cap roof | Rain protection | 3 minutes |
| Decorative paint | Visual appeal | 15 minutes |
With customization complete, the finished feeder requires proper placement to maximize bird visits and ensure safety.
Installation and ideal location
Hanging methods and security
Secure suspension prevents accidents and protects both birds and the feeder itself. Thread sturdy twine or wire through holes punctured in the bottle cap, creating a loop for hanging. Alternatively, wrap wire around the bottle’s neck several times, twisting it into a secure hanger that distributes weight evenly.
The hanging point should support the feeder’s weight when full, typically eight to twelve ounces depending on bottle size and seed quantity. Test the installation by gently pulling downward before filling to ensure stability.
Optimal placement strategies
Location dramatically influences bird activity and feeder success. Position the feeder in a partially shaded area that offers protection from harsh afternoon sun while remaining visible from windows for observation. Height matters significantly for safety and accessibility.
Ideal placement characteristics include:
- Five to six feet above ground to deter ground predators
- Ten feet from dense shrubs where cats might hide
- Near trees or bushes for quick escape routes
- Sheltered from strong winds that scatter seed
- Accessible for regular cleaning and refilling
Maintenance and monitoring
Regular upkeep ensures continued bird health and feeder functionality. Inspect the feeder weekly, removing wet or moldy seed immediately. Clean thoroughly every two weeks using a diluted bleach solution, rinsing completely and drying before refilling. Monitor bird activity to gauge seed preferences and adjust offerings accordingly.
This simple plastic bottle transformation provides immediate environmental benefits while creating opportunities for wildlife observation and connection. The minimal investment of time and materials yields substantial returns through increased bird populations, reduced waste, and the satisfaction of crafting something useful from discarded materials. Regular maintenance and thoughtful placement ensure this homemade feeder serves backyard birds effectively throughout multiple seasons.